Introduction
When setting up a fresh install of Windows 11, you’re prompted to log in with a Microsoft account by default. While this integration offers various benefits, such as seamless access to OneDrive and syncing settings across devices, many users prefer the privacy and control of a local account. However, Microsoft strongly encourages, to the point of forcing, the use of an online account during setup. In this blog post, we’ll explore the methods to bypass these attempts and successfully set up Windows 11 with a local account, ensuring you have the freedom and privacy you desire.
Install Windows 11
First, you need to install Windows 11. Create a bootable USB drive with a copy of Windows 11 using the Windows Media Creation Tool. This tool enables you to install a fresh copy of the operating system on your device.
These instructions cover the clean installation process.
Warning: This process will erase everything on your computer. Make sure to back up any important files before proceeding.
Boot from USB: Start your PC with the Windows 11 USB flash drive inserted. When prompted, press the required key to boot from the USB device.
Laptop users - If you have a Windows laptop, you can usually open the boot menu by pressing F12 as the laptop starts, before the windows loading screen.
Desktop users - This can vary, if you have a pre-built / proprietary desktop (ie an HP or Dell etc) you can try pressing F12 on startup. Alternatively you can boot into the BIOS by pressing F10 or F2 or Del (model dependant) Once you are within BIOS, you can either select what device to boot from, or change the boot order to boot from any connected USB devices first. Then save the BIOS settings with F10 and restart.
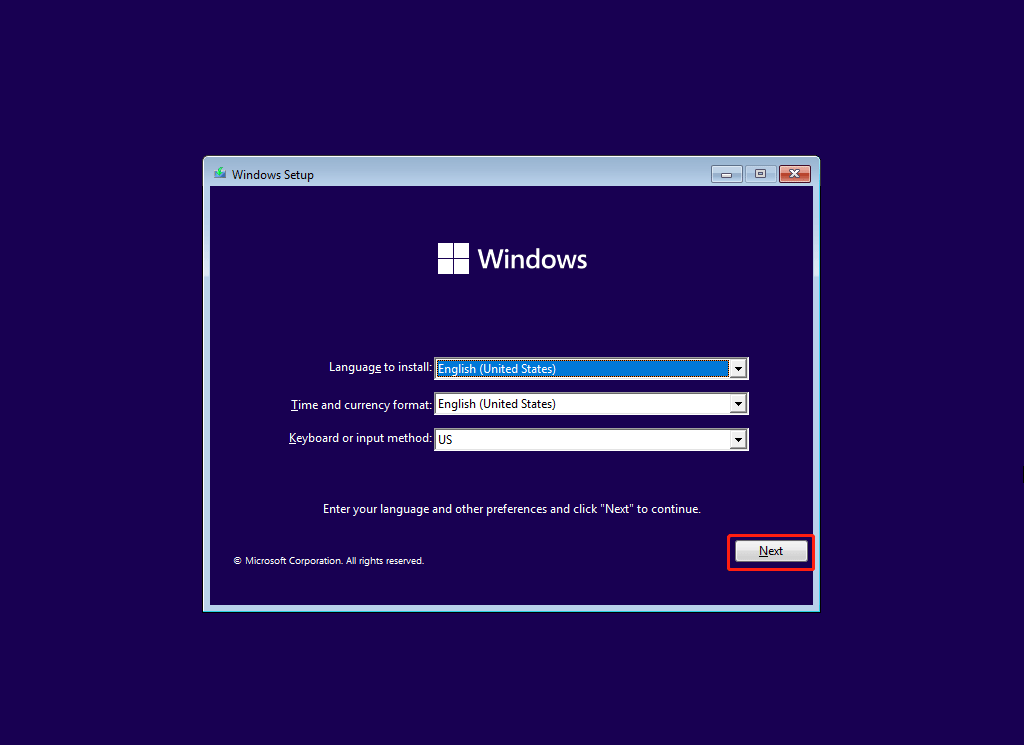
Windows Setup: In the “Windows Setup” interface, click the “Next” button.
Then click the “Install now” button.
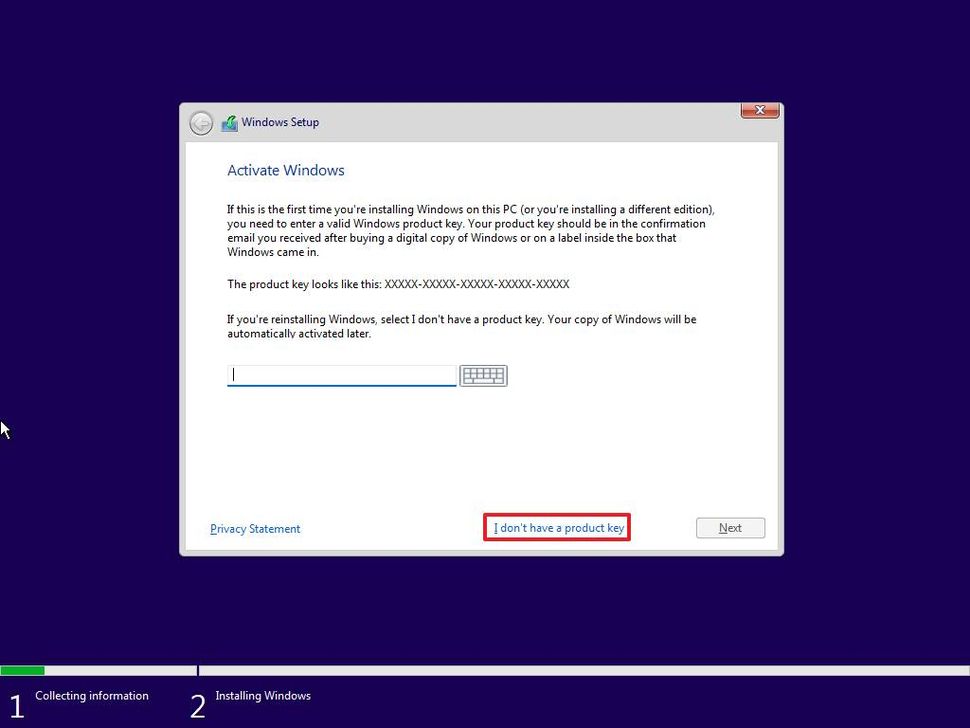
Product Key: If you’re reinstalling, or do not have a product choose “I don’t have a product key” to continue. If this is your first installation and you have a product key, enter it now (note: a product key is not required to use Windows).
Windows Editions: Select the edition of Windows 11 (If applicable). Click Next.
Accept License: Select the “I accept the license terms” option to continue. Click Next.
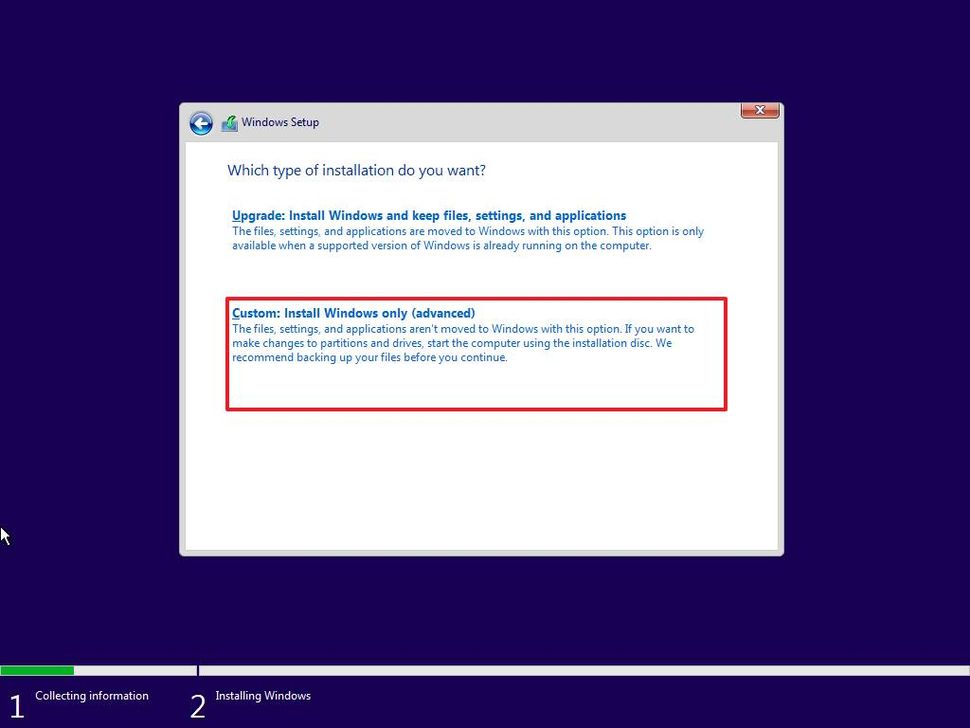
Clean Install: Click the “Custom: Install Windows only (advanced)” option to continue with the installation.
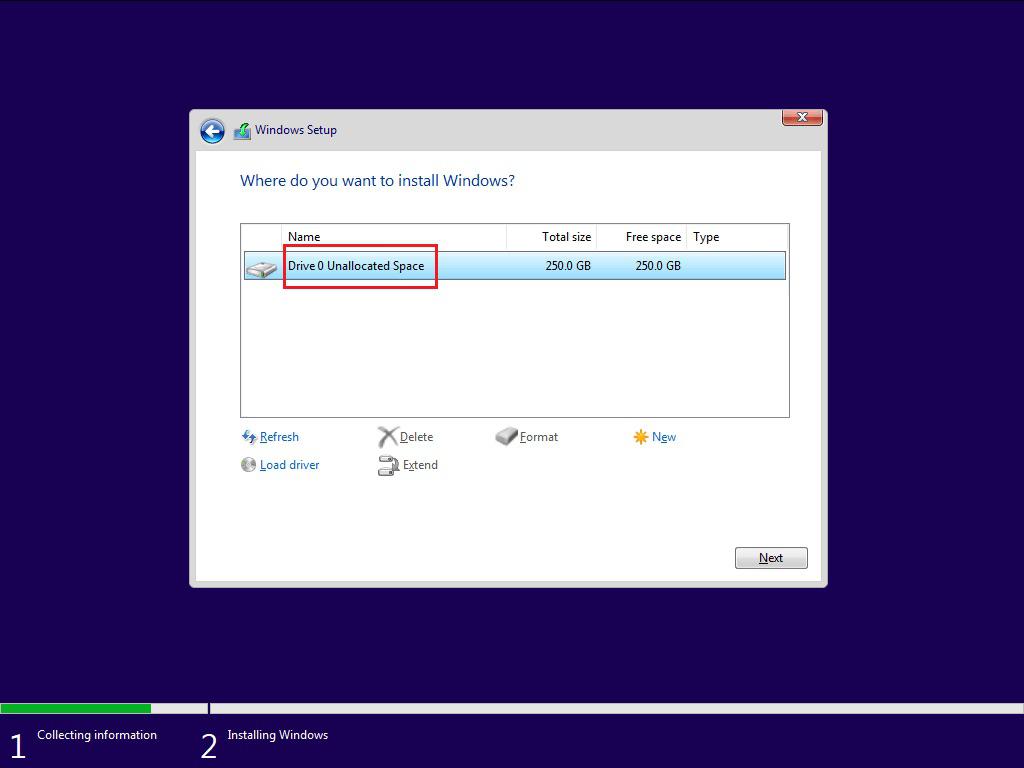
For a completely clean installation, delete all partitions on the drive where you want to install the OS.
Select Install Location: Once the drive is entirely unpartitioned and shows as “unallocated space”, select it as the install location and click “Next”.
Complete Installation: Let Windows complete the installation. Once finished, you will enter the configuration and set up screen for Windows 11.
Windows 11 Setup Wizard
Microsoft actively monitors and addresses bypass methods. Not all methods will work every time, but fortunately, trying different approaches until one succeeds is straightforward.
Method 1. Enter Incorrect Details
During the Windows 11 setup process, after connecting to the internet, your computer will check for updates, display a license agreement, and prompt you to log in with a Microsoft online account.
Instead of entering a Microsoft account, type a local account name and password (for example admin and password123) on the “Let’s add your Microsoft account” page. This action will trigger an “Oops, something went wrong” error, hopefully causing the system to revert to the local account creation interface.
Method 2. Bypass Disable Internet Connection
If entering incorrect details doesn’t work, you can try disabling the internet connection and setup requirement to prompt the local user account option.
Use the “Shift + F10” keyboard shortcut to open Command Prompt on the Windows 11 setup and enter the following command: oobe\bypassnro which disables the requirement for an internet connection.
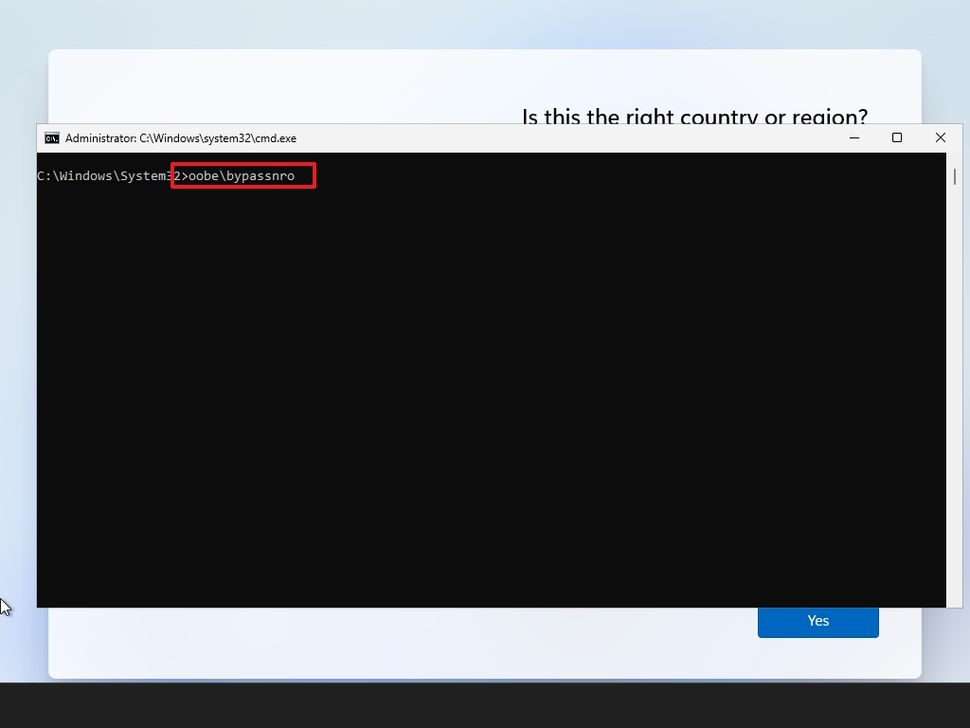
Quick note: The command doesn’t have any spaces. Also, the computer will restart at this moment. Once restarted, it will pick up where it left off, and you will need to disable the internet.
To disconnect from the internet, you have a couple of options:
Wi-Fi Users: If you’re using a laptop connected via Wi-Fi, look for a button that disables Wi-Fi entirely or switches to airplane mode, which disables all wireless connections.
Ethernet Users: If you’re connected via Ethernet, simply unplug the Ethernet cable from your computer.
Disable by software: To disable the internet connection during setup without physically turning it off, use the “Shift + F10” keyboard shortcut to open Command Prompt.
Type the following command to release the network connection and press Enter: ipconfig /release.
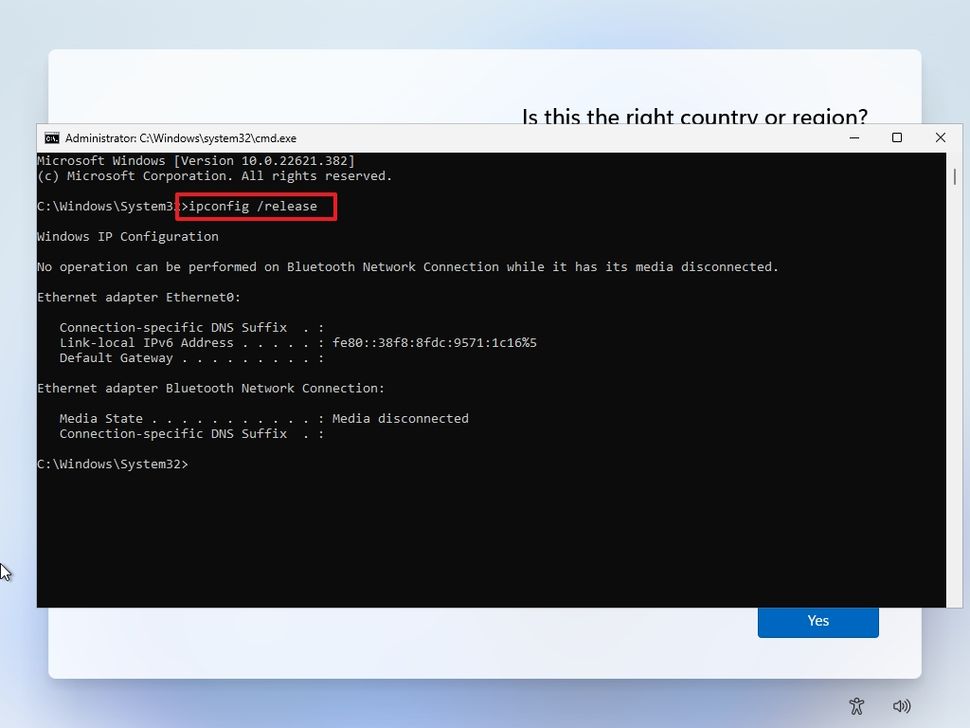
Once disconnected, the setup will notify you of the lost internet connection. Click the back arrow, and you will be able to create a local account and continue with the installation process, bypassing the requirement to use a Microsoft online account and create a local account instead.